Here is my FAILED attempt at this project, and what I learned along the way.
First off, I found a new method (find detailed directions here) for making hard boiled eggs so to avoid getting that grayish/blueish ring around the yolk. It was pretty simple starting off.
Get your eggs out and find a tack. Now poke a hole into the shell of the egg on the bigger end, but don't go too deep.
Now put your eggs in a pot and cover with cold water, put on stove and bring to a boil. Once water is boiling lower the heat to a low boil and let it go for 10 minutes.
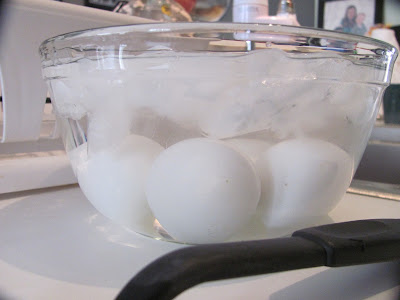
As soon as the 10 minutes are up using a slotted spoon immediately put the eggs into a bowl of ice water. Let them sit until cool.*** Please keep reading to find my experience and advice with this last step***
While the eggs were cooling I got a couple of bowls of water out and put a few drops of red food coloring into one, and then red and blue into the other to make a light purple. Once the eggs were cooled I proceeded to ATTEMPT to remove the shell. This was quite a task. Usually my hard boiled eggs are easy to peel, but I think putting them in the ice water made it more difficult. The shells broke off into tiny pieces and took chunks of the actual egg with them. So next time I attempt this, I will skip the ice water. This was my misstep #1.
So after seeing how gnarly my eggs looked, I thought about nixing this whole thing. But I didn't want to waste perfectly good food just because it didn't look appealing. So I cut them in half and was pleasantly surprised at how brightly yellow the yolks were! No grayish/blueish rings! The insides were perfect. I think I'll stick to the method of putting a hole in the egg before boiling from now on! So I scooped out the yolks and put them in a bowl to mix up later.
 I moved onto the dying of the eggs. Sigh... I thought this would be easy peasy. Not so much. I dropped a half an egg into the pink water and waited a minute them removed. No color. Tried again... still no color. So avoid my mistake of only putting in a few drops of food coloring... seems to me you need a lot for this project. So I put some more drops of food coloring in and dropped the egg in... whoops- I forgot to stir the water! Misstep #2. Now that I had color (albeit not as smooth as I wanted) showing up after pulling them out of the colored water I put them on a paper towel to rest and dry. BIG MISTAKE. The paper towel weaving was imprinted onto my eggs! So this was my misstep #3.
So after sighing and griping about what I thought would be an easy project I got to mixing up the filling for the eggs. My recipe is simple. A dollop of mayo, small drop of mustard, sprinkle of paprika and pepper and super yummy deliciousness ensues. I put the mix back into my weird looking eggs.
So here is my finished project on pastel colored deviled eggs.
Not exactly the picture perfect plate floating around on Pinterest. But they were yummy!
So here is what I learned...
*In my experience peeling an egg that is a bit warmer will probably guarantee a cleaner break in shell, making for a nice looking egg.
*You need more than a few drops to dye a hard boiled egg!
*Don't let your eggs rest on a paper towel after dying them, put them on a plate!
*Just because it ain't pretty don't mean it ain't yummy!
This is not my last attempt at you, pastel colored deviled eggs! I will try and try again, feeding my husband as many of you little suckers as I can until I have perfected you. Or until he tells me his stomach can't take anymore.
~ Miranda


No comments:
Post a Comment